This really is the easiest way to connect a new Wi-Fi extender you have to your router, and can sometimes be done in seconds versus the more long winded method of logging into the extender which can take several minutes and need several goes to get it right first time.
Therefore, if you have physical access to your router and it has a WPS button, this can be the way to go if you just want to quickly connect your router and extender in a no nonsense way, and get connected without any complex custom configuration. It’s also a good alternative method if the manual custom configuration method doesn’t work for whatever reason. WPS setup is quick and easy.
Here are the very quick steps:
- Press the WPS button on your router
- Press and hold the WPS/Pair button on your repeater
- Wait up to two minutes for them to connect
- Your extender will clone your router’s SSID/password.
- A solid green light indicates they are connected.
- You can now connect to the extender as an extra access point
Now let’s cover the steps in more detail with screenshots.
Connecting A Router And Extender via WPS (Illustrated Steps)
Step #1 – Firstly, with your extender plugged in, find and push the WPS Button on your router:
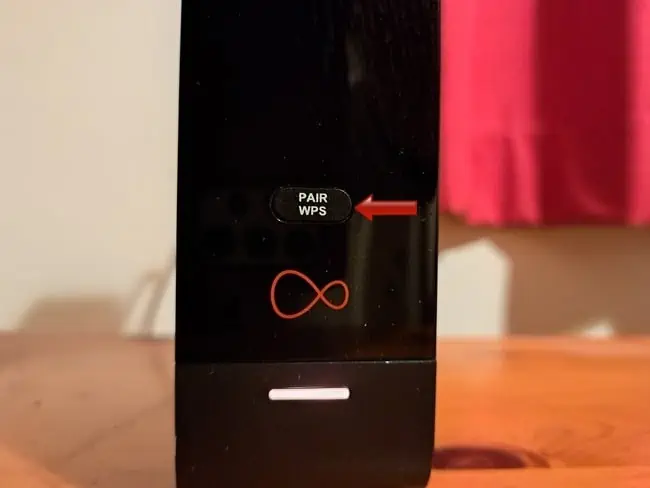
It might be a button labelled as WPS/Pair, or might just have the standard two arrows symbol as in the featured image above. However it’s labelled, push or push and hold it until it the button/LED starts blinking (means it’s searching for other WPS enabled devices).
Step #2 – Then, find and push the WPS/Pair/Connect/Wi-Fi button on your extender:
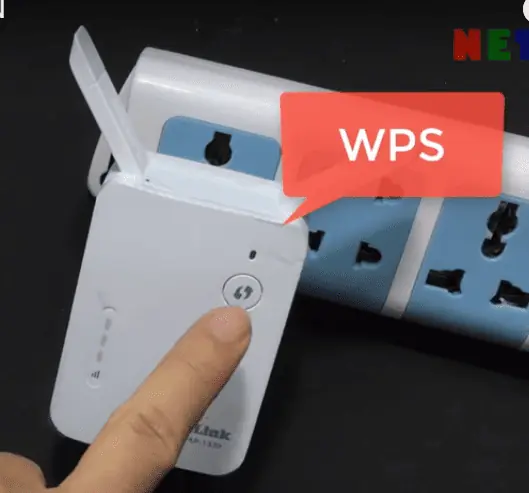
Again, it can be labelled differently on different models, but there’s usually only one button your can push anyway – it might have WPS/Pair/Connect written on it, or just have a Wi-Fi symbol of some kind on it.
However it’s labelled, push and hold it until it too starts blinking. Now you’ve got both your router and extender’s WPS feature scanning for nearby devices also doing the same.
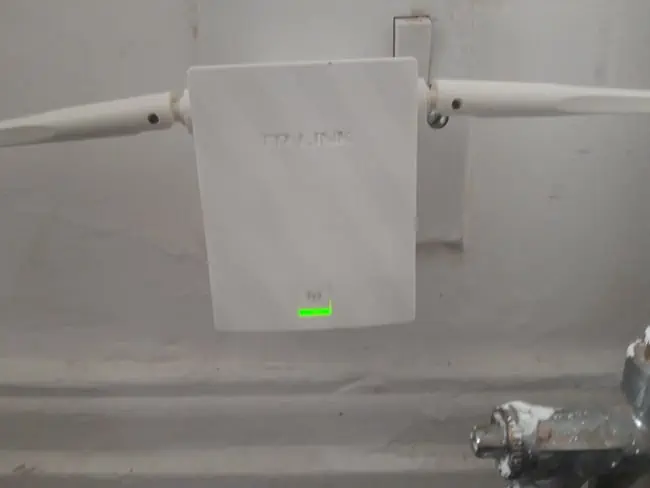
Step #3 – You need to wait for up to 2 minutes for the router and extender to find each other via their WPS scans. While scanning and/or connecting, you’ll see both WPS lights blinking/flashing.
The LED might start flashing slower and slower, but eventually, should turn solid. A solid green WPS light on both the router and the extender means they are both connected and it’s working. On some extender models, the WPS light might go off once fully connected, after a few minutes.
Step #4 – You are now free to connect devices to your extender’s network, which is in turn connected to the router’s network and “capturing” it’s signal. Also, with WPS configuration, your extender will usually copy your router’s SSID (network name) and password, so you’ll use the exact same credentials to connect to it as you do your router. The extender SSID might just have an “_EXTENDER” or similar suffix at the end, but has the same name as your router on the Wi-Fi networks list (if you’d rather not have this happen and have totally separate credentials, it’s better to set it up via a laptop/browser connection).
What Is WPS Setup Doesn’t Work Or Isn’t Available?
It’s true that the WPS button isn’t available on all routers, especially older ones. Also, it may be disabled or you may just not have access to the router to use it. What can you do in these cases if using the WPS connect feature just isn’t possible for whatever reason?
It’s no big deal if you can’t use WPS, since there’s always at least one other method of connecting an extender to a router, and that’s by connecting to, and logging into, the extender itself and configuring from there.
Here are the very general steps:
- Note down login details on your extender and plug it in.
- Find the extender’s SSID (network name) on your device and connect
- Open a web browser and type in the access URL
- Enter the default username/password
- Set up a new SSID/username/password if desired
- Find and connect to your router’s Wi-Fi network.
- Either copy or modify your router’s credentials for the repeater.
- Save settings and connect the device to the new network.
- A green light indicates the repeater is connected and working.
See our full, step by step guide with screenshots on how to connect your router and extender this way if you can’t use WPS. It takes a bit longer but isn’t too hard as long as you follow the steps precisely and completely finish the setup process as instructed by the extender’s setup guide.
Some routers also have yet more methods of connecting to routers, such as using an app – check the instruction manual/quick guide supplied with your repeater if you still have it for more setup methods.
